View final character animated (Double click to change the animation)
The goal
Double click to change the animationThis article aims to explain and share the work process I use to animate characters with Blender and to use them in WebGL projects based on three.js
Here is the github project with the code.
Here are the .blend files & source files of the different part of the process.
modelling.zip | texturing.zip | rigging.zip | animating.zip
1. Drawing
Is a good practice to draw the model in front & side view to use as background image/template on Blender.
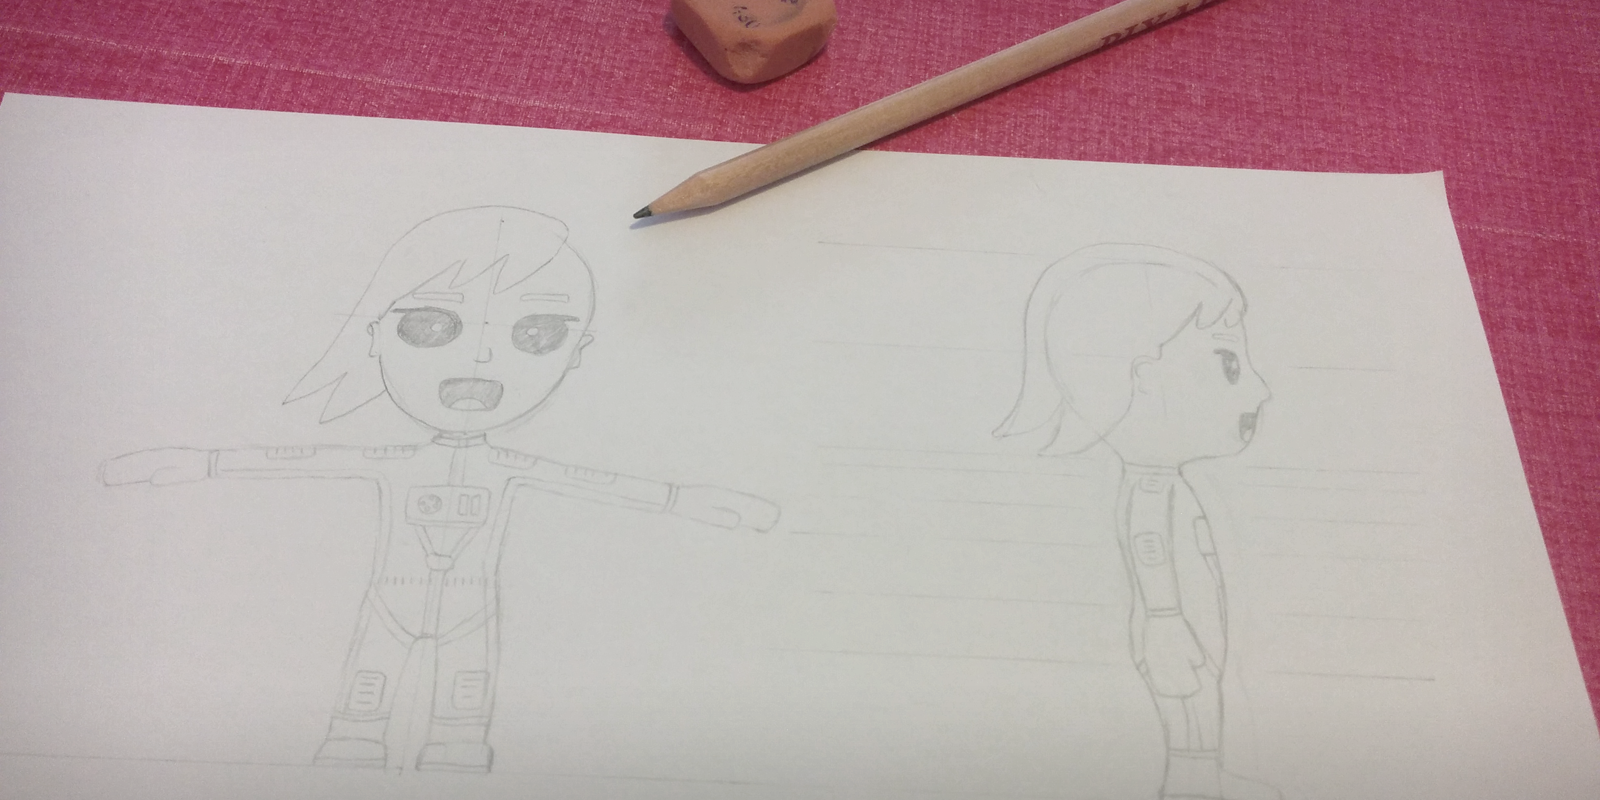 Front/Side view of Eva
2. Modelling
I made this character with Blender 2.77, but if you start this workflow in the future, try to use the last stable version in that moment. To become familiar with Blender there are a lot of videos & post related, I started with these tutorials blendtuts.com.
And one more specific was this Creating A Low Poly Ninja Game Character Using Blender that was very helpful to make our character. I think there are many ways to model a character as 3D artists, I guess you have to understand how we will animate it and what performance you need to add more or less polygons.
Here are the .blend files & source files of this part of the process: modelling.zip
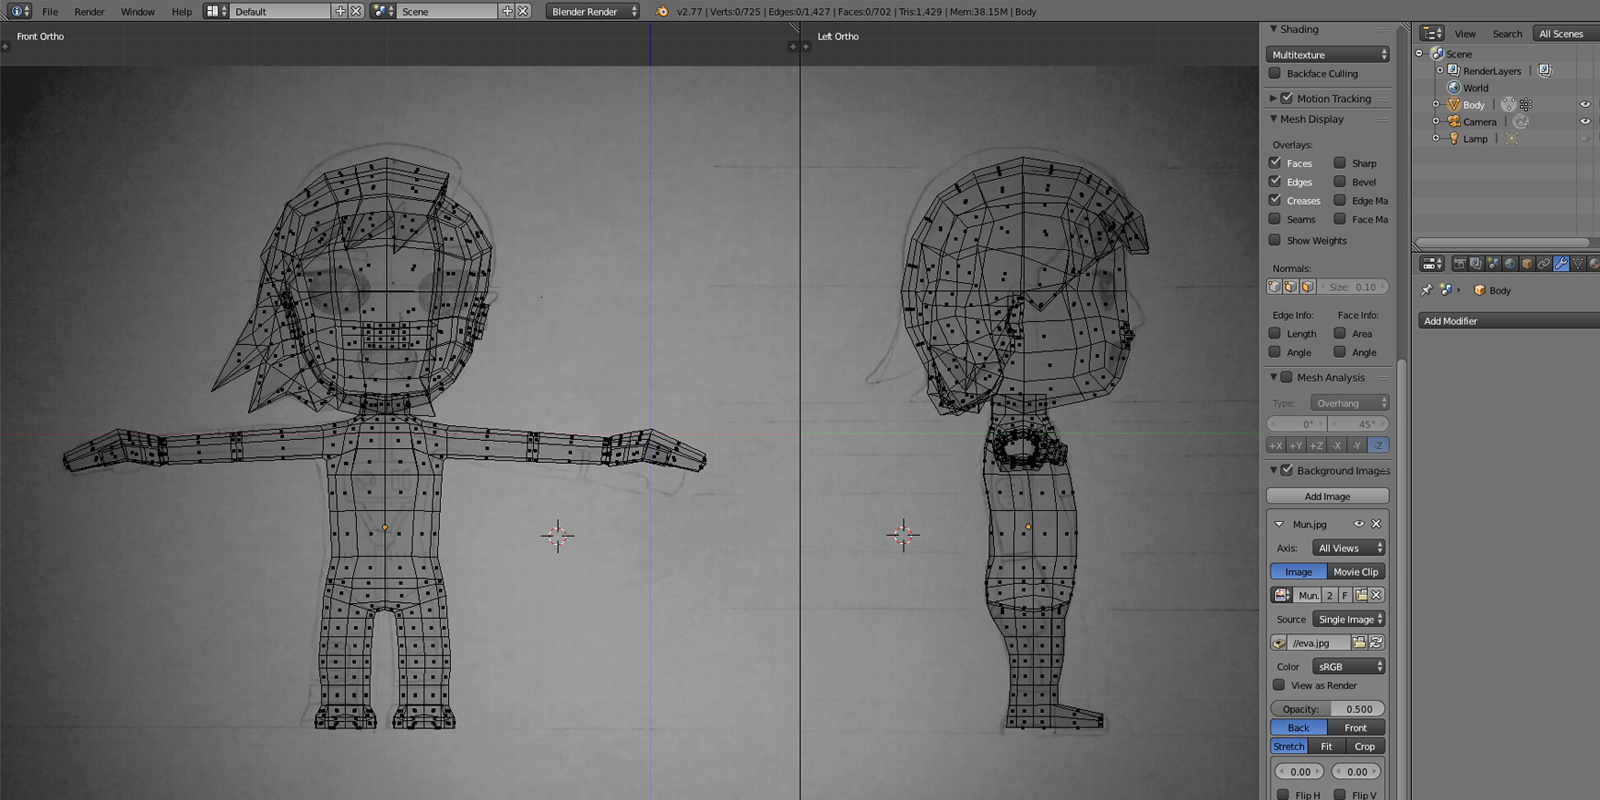 Eva model has around 700 faces (1400 triangles)
3. Mapping/Texturing
Following this tutorial you could have the basic motions to made it. First, I make the UV Mapping making all the seams that I consider necessary to obtain something like the below image.
Is recommended to reserve more space for important/detailed parts of the model as face, and reduce the size of less important parts as hair, legs or arms.
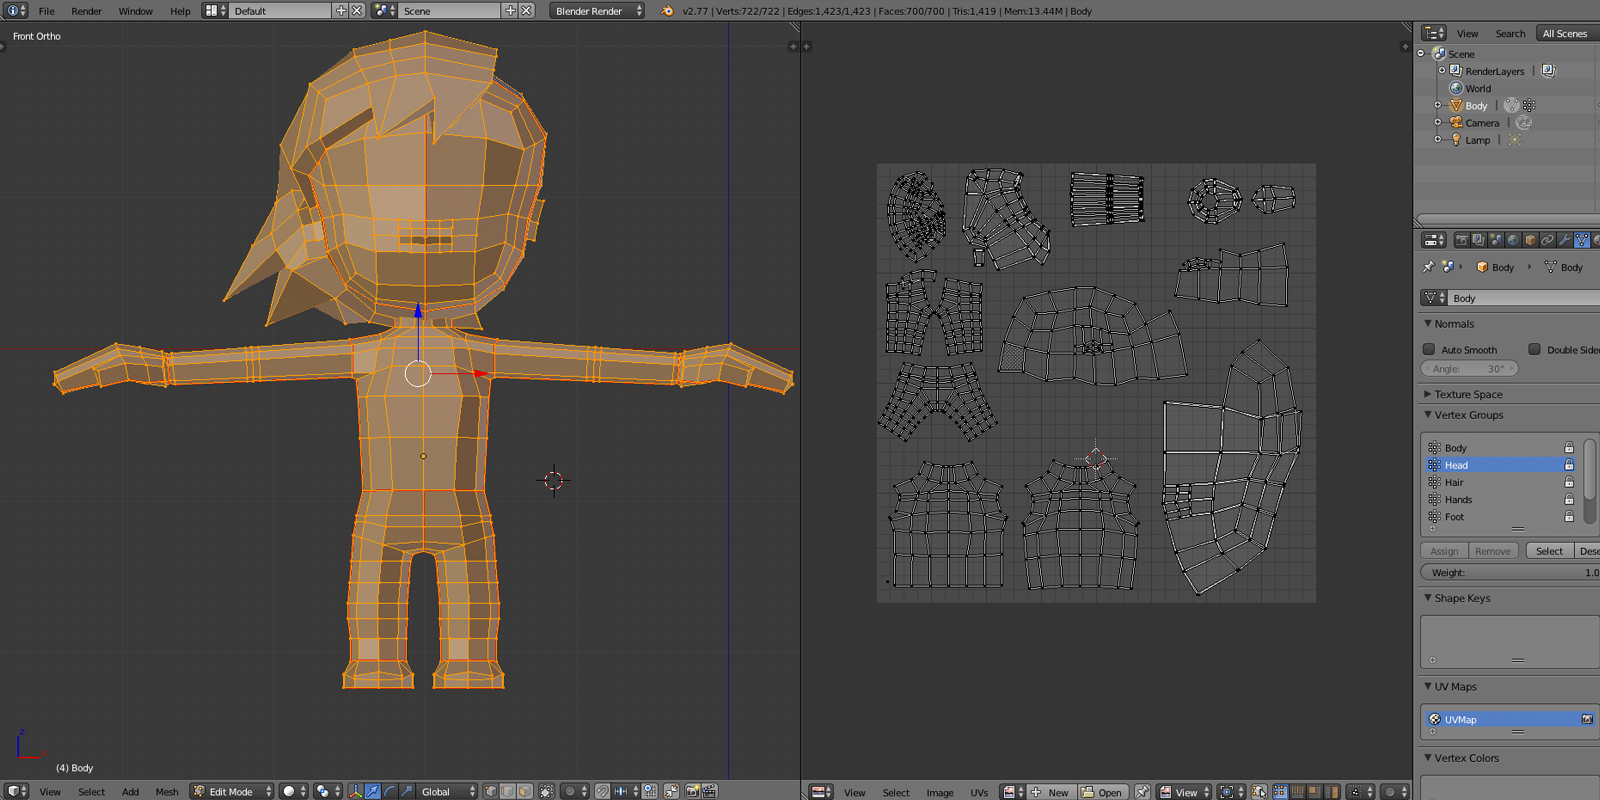 Eva unwrapped
I use Photoshop to draw the texture, but before to start texturing, I have prepared a basic three.js template to view the changes on a webGL scene instead on Blender. You can learn how I made it and download on step 4.
Here are the .psd, .blend files & source files of this part of the process: texturing.zip
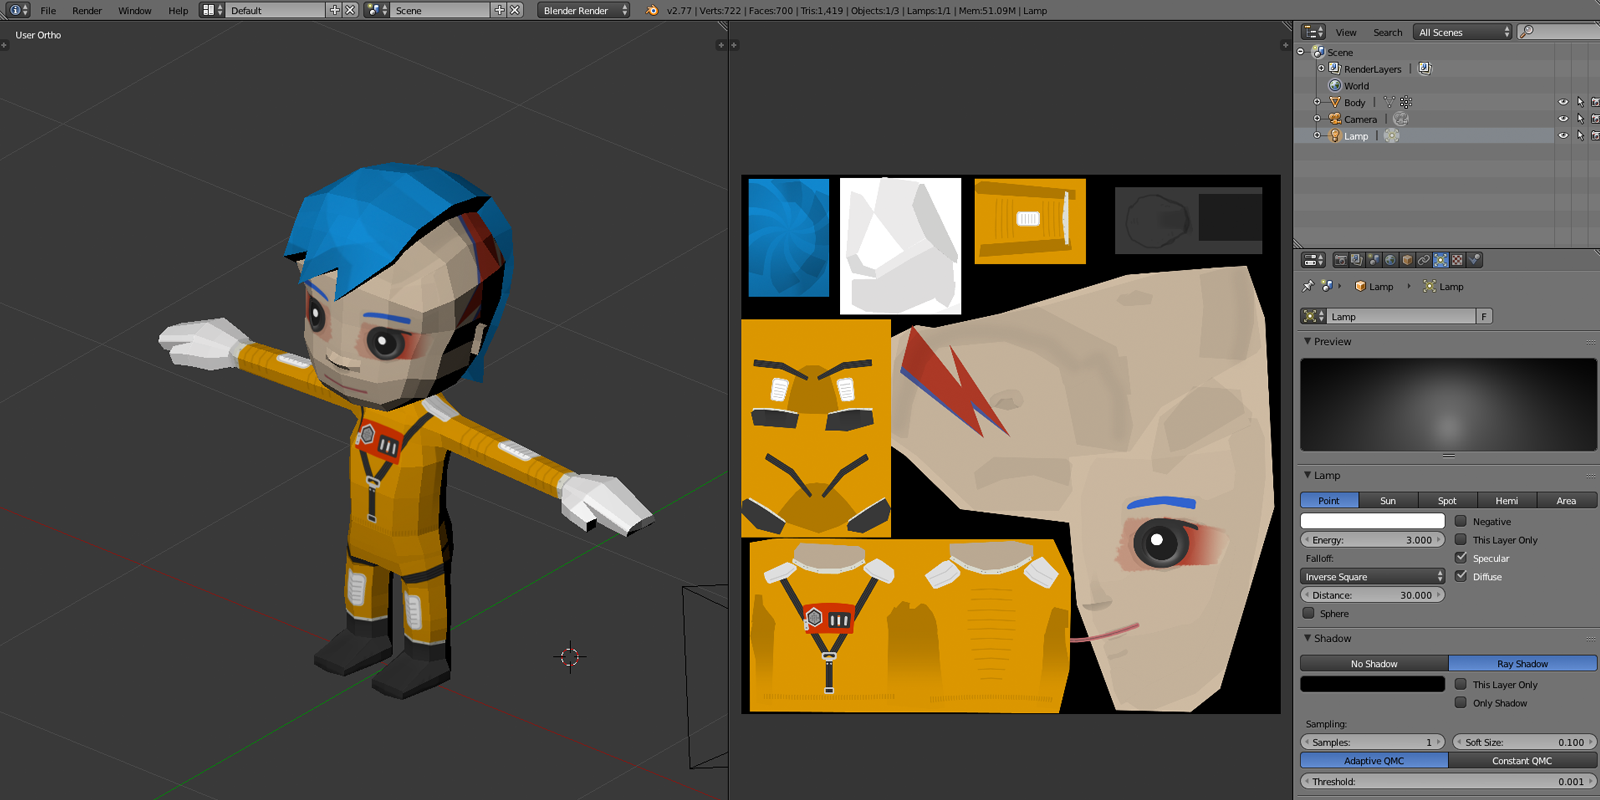 Eva textured on Blender
4. Exporting a textured Mesh (not animated yet) to three.js
- First, you need to move from ‘/utils/exporters/blender/addons/' the ‘io_three’ folder to ‘scripts/addons/‘ folder where your Blender app is isntalled. I used the three.js 79 revision for this tutorial but in the future is recommendable to use the last ‘master’ one.
- After in Blender, Open ‘Flie/User Preferences’ and with the ‘Add-ons’ tab selected search for ‘three’. If you move the exporter to the correct folder you could see the Add-on ready to be checked. Press ’Save User Settings’ & close de ‘User Preferences’. Now you will have the option ‘File > Export > Three.js (.json)’ activated.
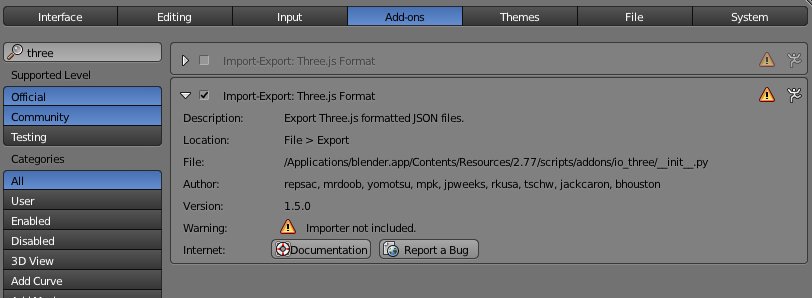 Activating three.js exporter Add-on
- Be careful with the name of your materials & textures to prevent errors, because if you don’t change them, by default Blender use ‘Material’ and ‘Texture’ and if you have two different models with the same name only render the first that was loaded.
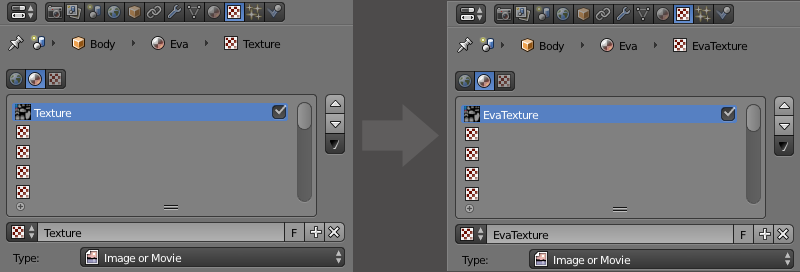 Renaming textures
- In this case (cartoon style) I changed Diffuse to #ffffff and 1.0 of intensity and Specular intensity to 0.0 (and automatically our material change from MeshPhongMaterial to MeshLambertMaterial when we export it).
 Changing Material properties
- To be focused on animation on this post, I decided work without shadows and with one ambient light, with this setup we will have a pure colored And more cartoon style character. If you need to work with shadows & more lights be careful with the performance because is very painful, especially on mobile devices.
- Be sure your model will be placed and scaled in an undesired position. Now we need to scale & grab to the correct one.
Now is a good moment to decide the size of our model. Especially if you work for VR, to have the real measures is very important.
In Blender/three.js 1 unit is 1 meter. For this reason our character will measure z = 1,7.
REMEMBER - Axis in three.js and Blender are different.
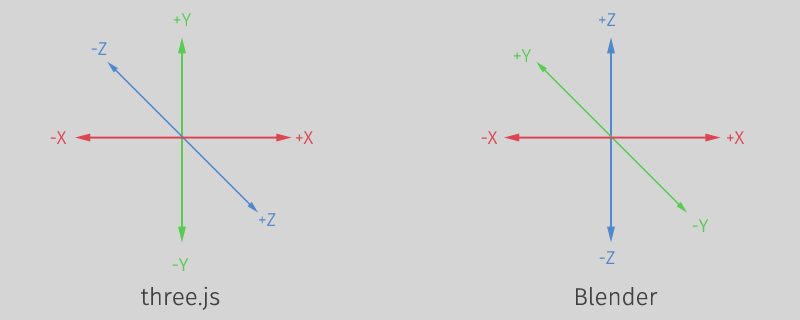 three.js vs. Blender axis
- Scale your model to obtain the desired height and press ctrl+A to Apply ‘Location’ & ‘Rotation & Scale’.
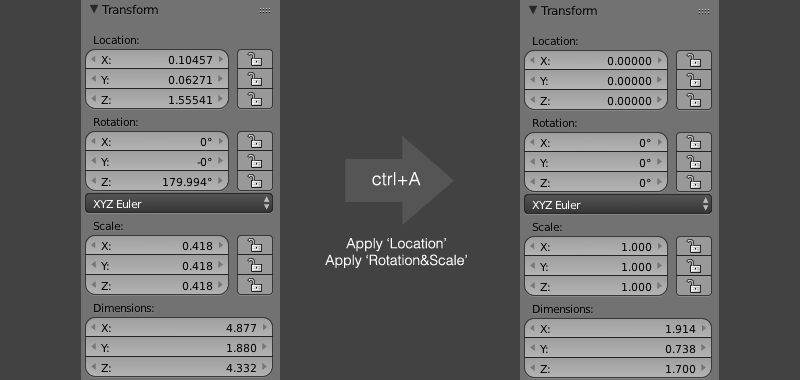 Initial measures vs. desired
- To export the .json file of this static Mesh from Blender, use the default settings and check 'Face Materials' & 'Textures'.
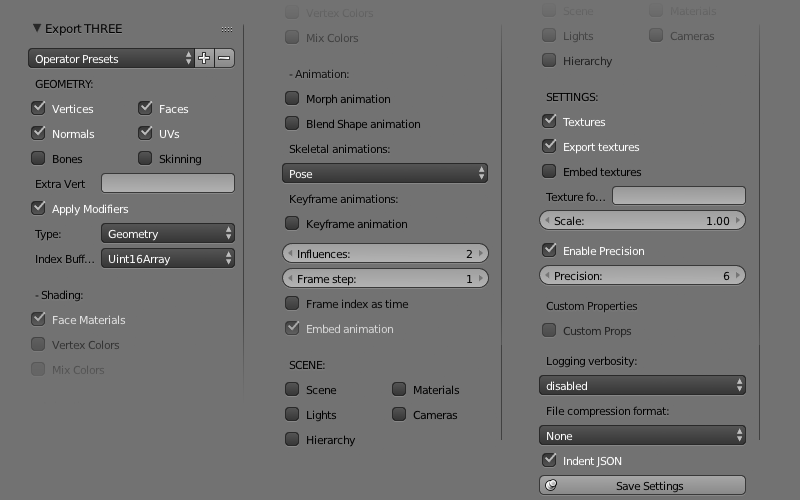 three.js exporter settings to export a static mesh
You can download the project at this point on ‘texturing’ branch of the github project.
5. Rigging
I learned with this tutorial but in this case I simplified hands with less bones (my model only has a thumb and other bone for the rest of the fingers).
Be careful with Vertex Groups, if you have made your own groups when you were modelling remove all before you execute ‘Armature deform with automatic weights’ because their names are similar to bones can produce undesired effects when you animate the character.
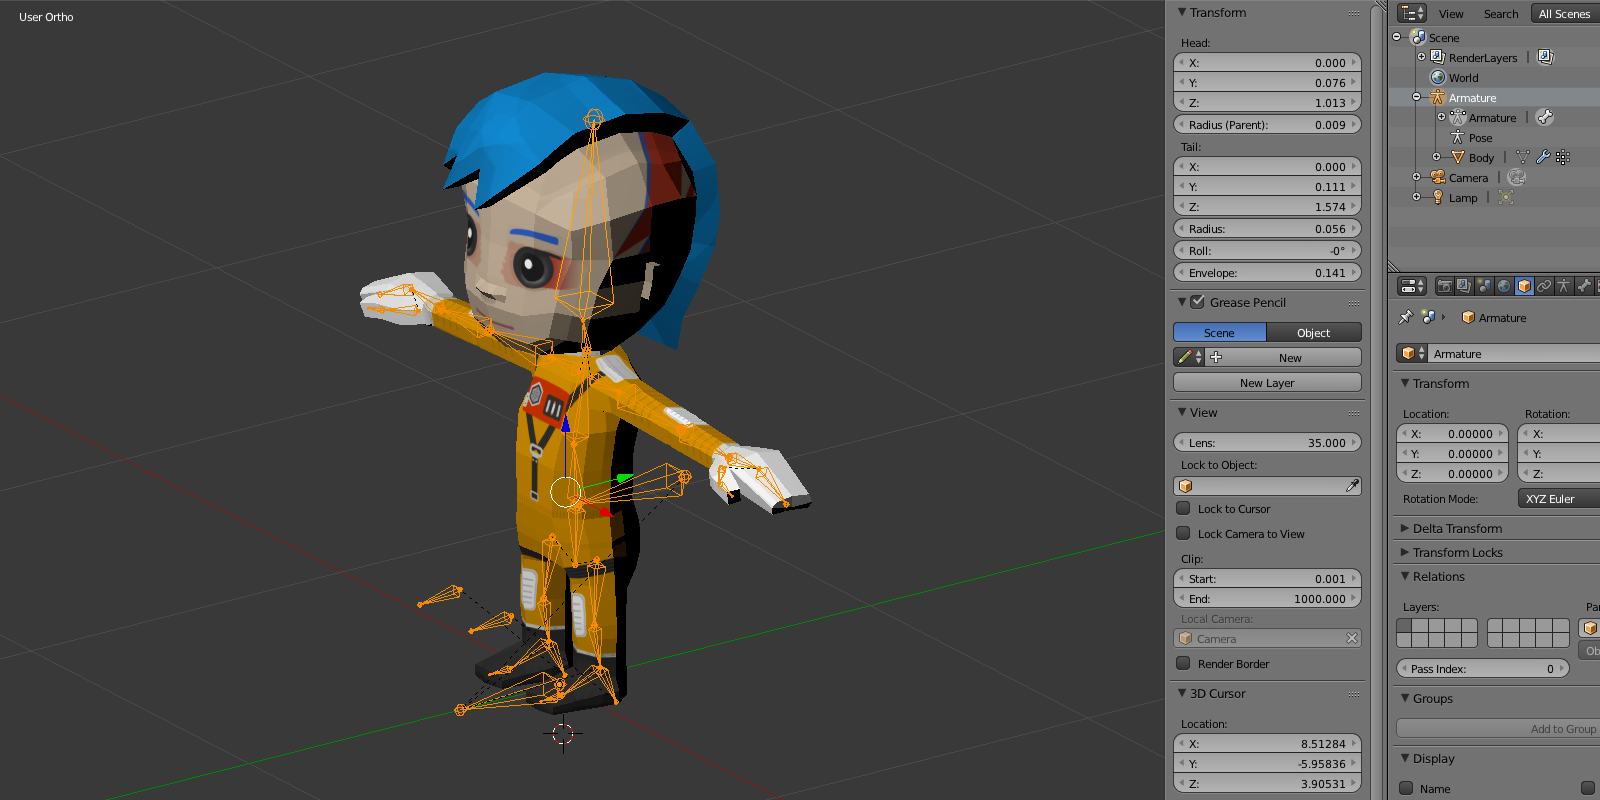 Eva rig has 31 bones
Here are the .blend files & source files of this part of the process: rigging.zip
6. Animating
Here, there are two tutorials to make a walk & run cycle, with which you can familiarize yourself with the tools to animate with Blender. These tutorials uses a slightly different rig but is very simple to understand how to make it with our rig.
Beside this, you can learn or research about 12 principles of classic animation or to buy some book of classic animation like ‘The Animator's Survival Kit’
To create perfect loop animations in the ‘Dope Sheet’ menu, I recommends you to set ‘Channel/Extrapolation Mode’ to ‘Linear Extrapolation’. I think, by default use a Bezier extrapolation what does not work well for loops.
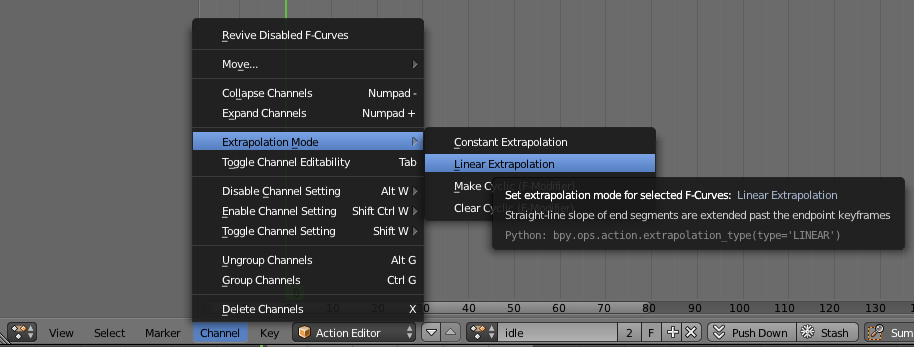 Setting Extrapolation Mode to Linear
In our case, I created 5 animations for Eva: idle, hello, walk, run & pose.
Here are the .blend files & source files of this part of the process: animating.zip
7. Exporting an multiple animated SkinnedMesh to three.js
Before to export to Blender you need to export in Pose mode. The easiest way that I found to do it, is to create a ‘Pose’ animation with 1 frame with all the bones restored (Press Alt+r, Alt+g, Alt+s). Remember you need to export with the Mesh selected in ‘Object Mode’ and with the Armature with the pose position (as the image below).
 Exporting Eva in Pose mode
You need to check ‘Bones’ ’Skinning’ on ‘GEOMETRY’ and ‘Keyframe animation’ ‘Embed animation’ on ‘Animation’. Anyway, in ‘eva-animated.blend’ file is saved with the correct options checked.
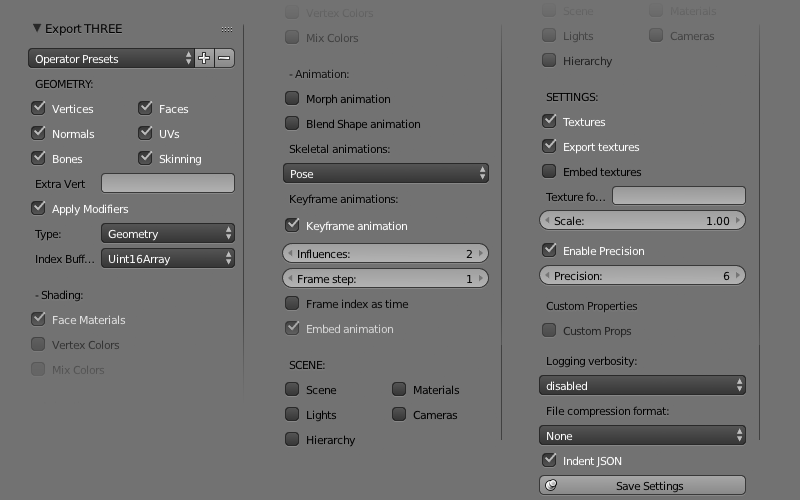 Settings to export an animated model
And now we only need to change a few things in our previous template to have our animated model with Blender running on a three.js scene. First we will use THREE.SkinnedMesh instead THREE.Mesh and to work with the THREE.AnimationMixer methods.
And that's all!. Now, you can download the project at this point on this Github project.
Double click to change the animationCredits
Arturo Paracuellos
Creative technologist & 100% of unboring.net
Email | Twitter | LinkedIn
"I am open to collaborating in new projects and to work remotely with companies on real time render projects, especially if they are focused on VR.


 A WebVR experience to prove your piloting skills above the clouds.
 How to turn a 6 slides keynote into a WebVR experience
 How to make an interactive VR story for everyone